SCIM
Enterprise EditionYou can sync users and groups from your identity provider (such as Microsoft Entra ID) to Data Mesh Manager.
This guide will show you how to set up SCIM2 (System for Cross-domain Identity Management) for your organization using Microsoft Entra ID (formerly known as Azure Active Directory). Other SCIM compliant providers work similarly, but the setup might differ.
Note: SCIM2 is only available in the Enterprise Edition of Data Mesh Manager / Data Contract Manager.
Prerequisites
- You must have the Cloud Application Administrator role in Microsoft Entra ID.
- If you want to provision groups, a Microsoft Entra tenant with Microsoft Entra ID P2 or other another premium license is required.
- You must be Organization Owner in Data Mesh Manager
- Your Entra ID usernames are valid email addresses
Configure SCIM provisioning using Microsoft Entra ID
Learn more in the official reference: https://learn.microsoft.com/en-us/entra/identity/app-provisioning/on-premises-scim-provisioning
Note: The Microsoft tutorial refers to "on-premises" SCIM provisioning, but the steps are the same for Data Mesh Manager Cloud and Self-Hosted deployments.
Step 1: Generate API-Key
See API Key
Step 2: Create an Enterprise Application
- Go to https://entra.microsoft.com/
- Sign in as a Cloud Application Administrator
- Ensure that the correct directory (=tenant) is selected
- Click Applications in the left navigation
- Click Enterprise applications
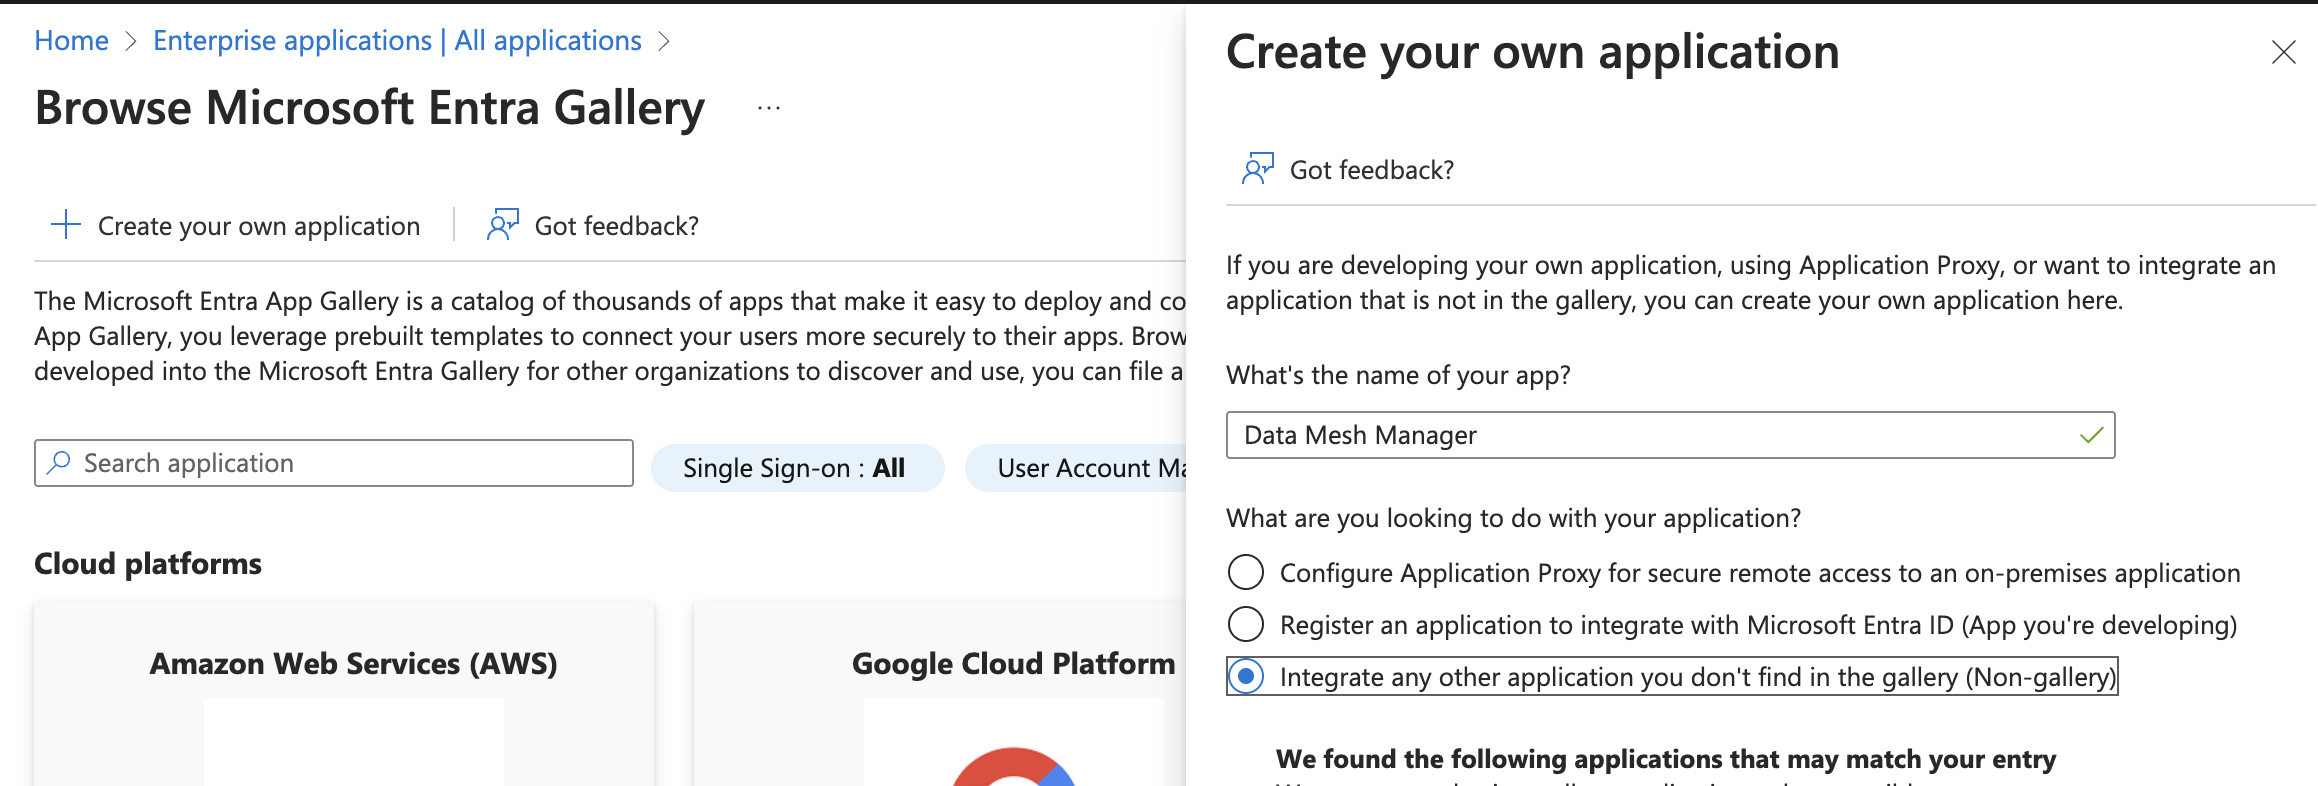
- Click New application
- Enter a name, e.g., Data Mesh Manager
- Select Integrate any other application you don't find in the gallery (Non-gallery) and click Create
Step 3: Configure SCIM provisioning
- In the Enterprise Application, click Provisioning
- Click New configuration
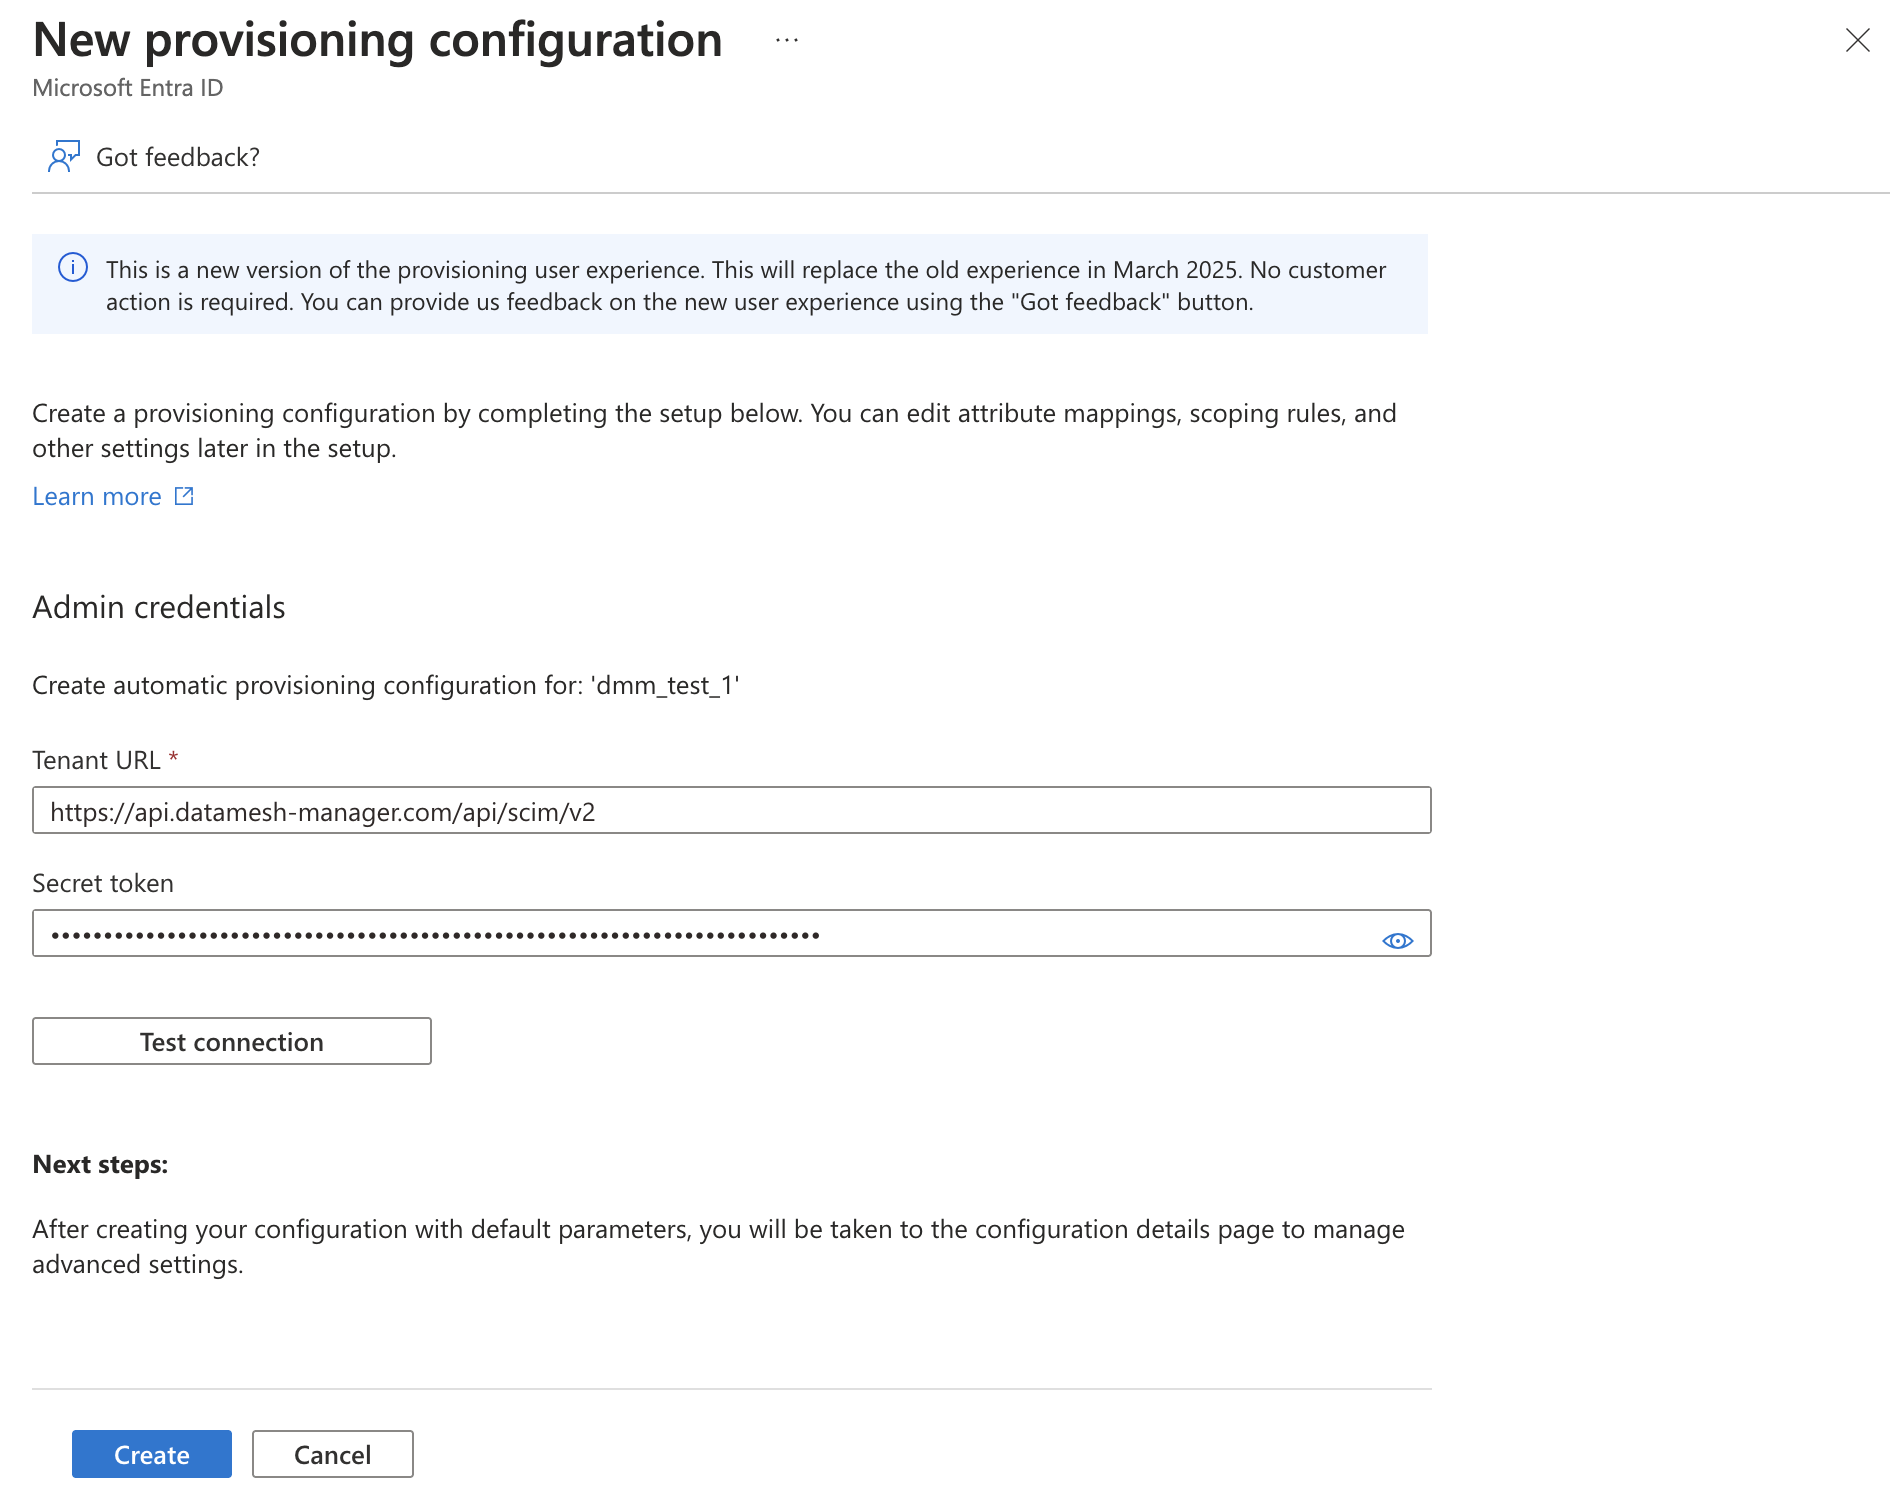
- Enter the following values:
- Tenant URL:
https://api.datamesh-manager.com/api/scim/v2(replacehttps://api.datamesh-manager.comwith the URL of your instance if you are using the self-hosted version) - Secret Token: The API-Key you generated in Step 1
- Tenant URL:
- Click Test Connection to verify the connection
- Click Create
Step 4: Assign users and groups
- Go to Users and groups
- Click Add user/group
- Select the users and groups you want to provision to Data Mesh Manager
If you want to sync all users and groups to Data Mesh Manager, you can change the scope in Provisioning > Settings > Scope to Sync all users and groups.
Step 5: Configure User Attribute Mapping
- Go to Attribute mapping (Preview)
- Click Provision Microsoft Entra ID Users
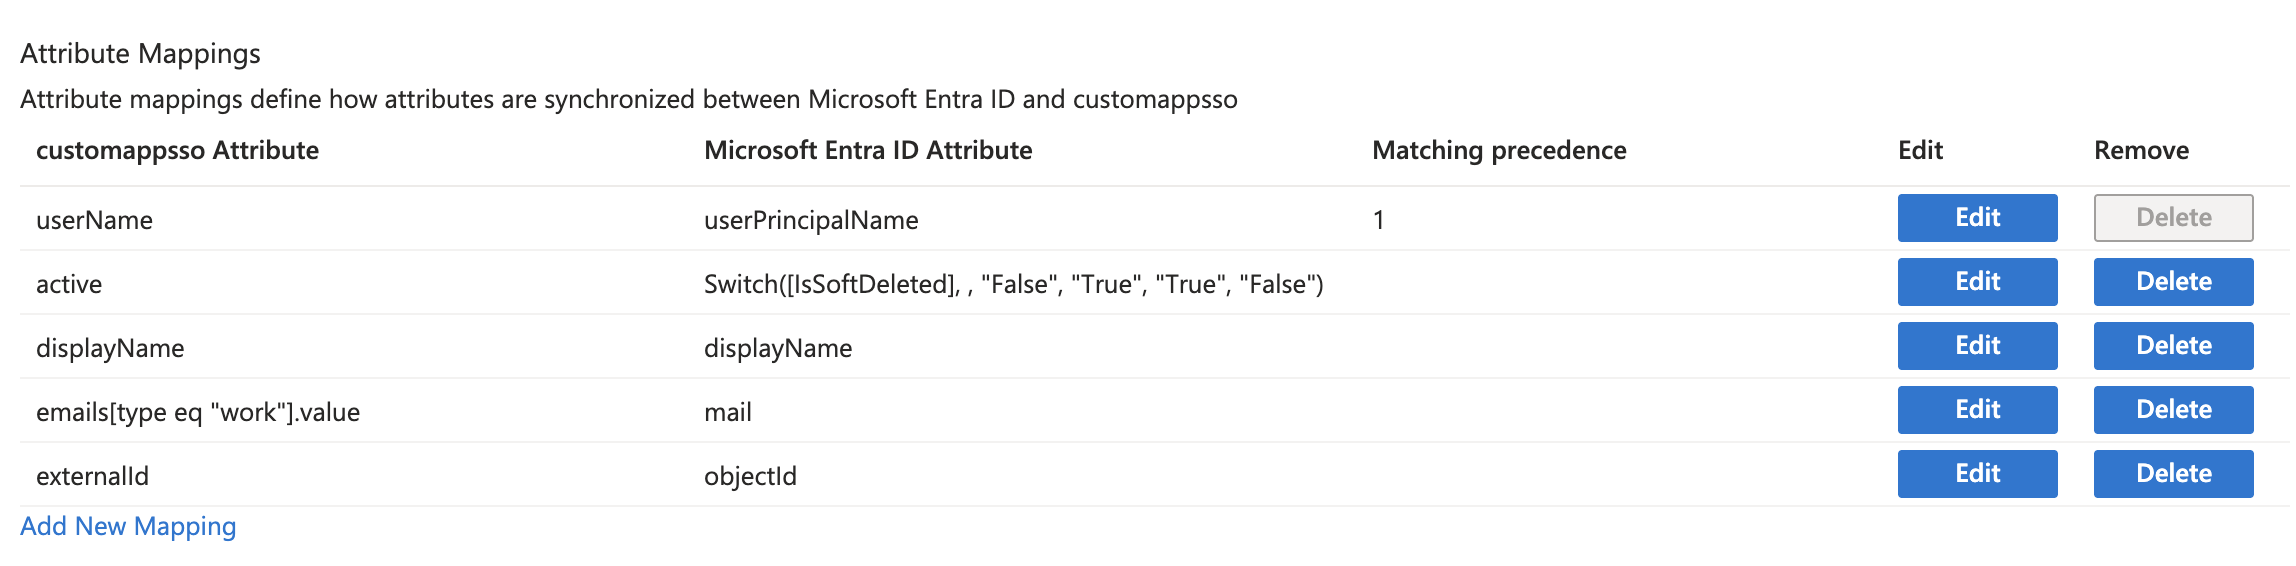
- Configure the following attribute mapping:
| customappsso Attribute | Microsoft Entra ID Attribute | Matching precedence |
|---|---|---|
| userName | userPrincipalName | 1 |
| active | Switch([IsSoftDeleted], , "False", "True", "False") | |
| displayName | displayName | |
| emails[type eq "work"].value | ||
| externalId | objectId |
If your userPrincipalName is not a valid email address, use the mail attribute instead for userName.
The externalId should be mapped to the objectId, as this ID will be used in Entra ID OpenID Connect SSO to identify the user.
Delete all other mappings and click Save.
Step 6: Test the provisioning
- Go to Provision on demand
- Select a single user
- Click Provision
- Make sure that the operation is successfully performed
Step 7: Enable SCIM provisioning
- Go to Provisioning
- Select Provisioning Status to On
- Click Save
- Validate that the provisioning is working as expected by checking the Provisioning logs
User Provisioning
If you provision a user to Data Mesh Manager, this logic will be applied:
- Create a new user with the userName as email address, if the user does not exist yet.
- The user is added to your organization (which is linked to the API key) with the role Organization Member in status active, when the
activeproperty is true. - The email address is considered as validated, if the
userNamematches theemails[type eq "work"].valueattribute. - If your organization is using SSO, the user will be able to log in with the SSO provider. Make sure, that the externalId is using the same ID as the configured subject in the SSO token. In case, you use Entra ID, the externalId should be the
objectIdfrom the user (which would be theoidclaim in the ID token).
The user can be updated and patched. Note, that the userName cannot be updated as of now.
Group Mapping
A configuration to map SCIM groups (Entra ID Groups) to team roles, and organization roles.
In the organization setting, open the SCIM configuration. The SCIM Mapping configuration is a YAML configuration.
Organization Owners
To enable all members of an SCIM group to become Organization Owners, add the following configuration:
scimGroupMappings:
  - scimGroup: <scim_group_name>
    type: organizationOwner
Replace the <scim_group_name> with the actual group name.
Team Member Roles
To add all members of an SCIM group to a team with a specific role, add the following configuration:
scimGroupMappings:
  - scimGroup: <scim_group_name>
    type: teamMemberRole
    teamId: <team_id>
    teamMemberRole: <team_member_role_name>
Replace the <scim_group_name> with the actual group name, <team_id> with the ID of the team, and <team_member_role_name> with the name of the team member role.
You can add multiple mappings for different groups.
Example
Here is a complex configuration example:
scimGroupMappings:
- scimGroup: dmm_owners
  type: organizationOwner
- scimGroup: dmm_marketing_owners
  type: teamMemberRole
  teamId: marketing
  teamMemberRole: Owner
- scimGroup: dmm_marketing_members
  type: teamMemberRole
  teamId: marketing
  teamMemberRole: Member
- scimGroup: dmm_data_stewards
  type: teamMemberRole
  teamId: marketing
  teamMemberRole: Steward
- scimGroup: dmm_data_stewards
  type: teamMemberRole
  teamId: sales
  teamMemberRole: Steward